You have no items in your shopping basket.
RSS

blog posts for August 2014

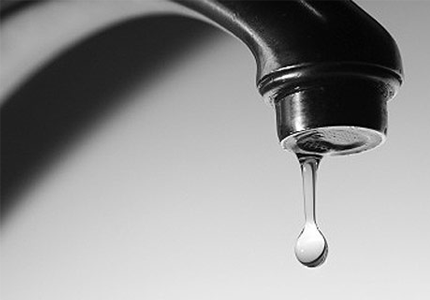
How to Fix a Leaking Tap

Leaking taps are hardly an emergency, but if left to drip incessantly they can drive a person insane. A constantly dripping tap is also a tremendous waste of water, which if you are on a water meter, could prove to be rather expensive: a leaky tap can quite easily drip away up to 24,000 litres of water over a twelve month period. So why do people ignore leaky taps?

A DIY Fix

Most people put up with a leaking tap because they mistakenly think it is difficult to fix and if they have to call out a plumber, it will cost them a fortune. But really, sorting out a leaky tap is well within the capabilities of a competent DIY enthusiast and if you have the right tools to hand, there is no reason why you can’t fix the tap yourself.

Leaking Tap

The Right Tools for the Job

To fix a leaking tap you need a few basic tools:

  • A set of spanners
  • A screwdriver
  • Some clothes to protect the chrome tap fittings
  • Replacement tap washer

Fixing a Leaking Tap

Before doing anything, make sure you turn the water off at the mains stop tap. Do make sure the water is off before you remove the problem tap or you will end up soaked and standing in a foot of water, which won’t do either the kitchen or bathroom much good. To do this, turn the taps on and leave them to drain out until there is no more water in the pipes.

Remove the top of the tap and the screw beneath. This will enable you to take the tap head off. If the tap head is stuck, spray some WD-40 into it to loosen it up (you may need to leave it for ten minutes or so to work).

Remove the body of the tap using a spanner. Do this very carefully and protect the chrome surface with a soft cloth. The washer is the circular rubber donut at the end of the tap body. Replace it with a new washer and re-assemble the tap, making sure you don’t over tighten any of the parts.

Turn the water back on and test the tap (if no water comes out, make sure you have closed off all the other taps). Does it still leak? If so, the washer was not the underlying issue and you need to go back to the drawing board and start again.

When the Washer isn’t the Problem

More often than not, a worn out washer is not the cause of a leaking tap. A more likely root cause is the valve seat upon which the washer sits. Over time, this becomes worn, often as a result of lime scale in hard water. The surface develops fine grooves and etched lines, which break the seal of the washer and allow water to seep through. Grinding down this surface with a purpose made seat grinder will solve the problem by creating a smooth surface for the tap washer to adhere to.

Help! I Can’t Fix My Tap!

In theory it should take no more than 20 minutes to fix a leaking tap, but if the mechanism is worn or you have tried all of the above and you still have a leak, then it is probably time to call on a plumber to do the job for you. Most plumbers will charge for one hour’s work, even if the job takes them less than five minutes, including a cup of tea and a chat. If you want to pay as little as possible, try and be flexible about when the plumber can visit – if he is able to call in on his way home, for example, he might charge you less. Or wait for a few weeks and call him to install your new stainless steel towel radiator and replace your tap at the same time.

Don’t forget to get a couple of quotes before engaging a plumber and ideally go with someone you know or who comes with good references. 

Super Storage Ideas for Teeny Tiny Bathrooms

Unless you are lucky enough to live in a Bel Air mansion, it is highly likely that your bathroom is a bit on the ‘compact’ size. Sad to say, most UK bathrooms are pretty small. Older properties built before indoor bathrooms were standard often have small bathrooms tacked on to the back of the house or constructed in a partition of a large bedroom. Modern homes are not much better. Here space is at a premium and the family bathroom is squeezed in between two or three equally small bedrooms. So if you, like most people, have to make do with a tiny bathroom, what are your storage options?

Built in Shelves

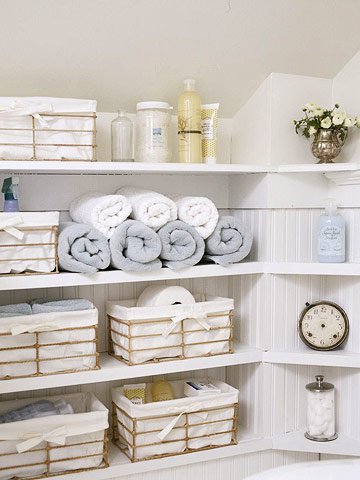
Built in shelves are perfect for irregular shaped bathrooms. Sometimes, thanks to poor planning, you end up with a gap between the end of the bath and the wall. Or you could have a small space next to the sink that is begging to be filled with something. Either way some shelves would be useful for storing toiletries or towels. Just remember that if you build them from scratch, the wood will need to be treated in order to protect it from the humidity.

The more shelves in a small bathroom you have the better. They are useful for storing toiletries and medication. You don’t even need to leave items on full view – simply buy some small storage containers and place them on your shelves. You could also build shelves above a towel radiator if it is not a full height one.

Multi Functional Storage

Simple shelving units can be used in a variety of different ways in a bathroom. In general, when space is at a premium, look for tall, thin units that will slot easily in between a bath and sink, or shower and sink. Shelves can be used for storing towels and larger items. Place baskets on lower shelves for toiletries and personal items you don’t want lying around in full view of your guests. If you place a shelf next to the bath or shower, fix a towel rail to the side of it and you instantly have a dual-purpose piece of bathroom furniture. Laundry baskets can be used as shelves. Buy a wooden laundry basket and stack towels on the top.


Built in Shelves

Bath Caddies

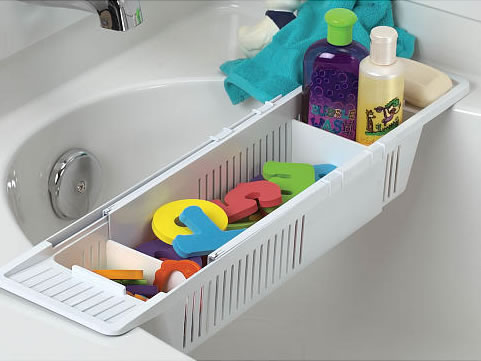
Bath Caddies

Bath caddies sit over the bath. They are a bit old-fashioned – your grandma probably had one a few decades ago – but if you purchase a stylish bath caddy it will be a useful investment. You can use a bath caddy to store bath toys for the kids, shampoo, soap and conditioner. Children like bath caddies because they can play with them at bath time, but you can use it to prop up a book for those moments when you are able to lock the door and enjoy a nice relaxing soak.

Sink Storage Units

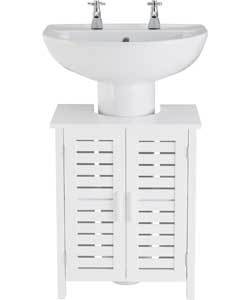
There are lots of sink storage units to choose from. In-built units are a good option if you are in the process of redesigning your bathroom. These offer extra storage beneath a sink unit and remove the need for a pedestal. If you already have a bathroom and you don’t wish to change the configuration, look at storage units that fit around an existing sink. Use them for storing cleaning products or toiletries.

When it comes to small bathroom storage, be creative. It is easy to source useful storage furniture on the cheap if money is in short supply; or you could build your own from discarded wood. Make use of all your small nooks and crannies and instead of struggling to find room for your favourite bath soaps and scented candles, you can enjoy a small, but perfectly formed, bathroom.

Sink Storage Units
Hard or Soft - Know Your Drain Blockages!

Blocked drains of any description can be a total nightmare. Nobody likes standing in a foot of soapy water every time they have a shower and a blocked toilet is deeply unpleasant, particularly if it’s the only one available and you all ate curry last night. Blockages are one of the commonest plumbing problems. They affect most home and business owners at one time or another, but what not many people realise is that there are two types of blockage: hard and soft. So what is the difference and how should you deal with each type of blockage?

Do I Have a Blocked Drain?

Drain problems often develop slowly. In the beginning when all is right with the world and your drains, water disappears instantly down the plughole and you don’t give the matter a second thought. After a while, though, you have standing water in the sink, shower or bath and curious ‘glugging’ noises are emanating from the plughole as the water slowly drains away. In the case of toilets, you might find that it doesn’t always flush properly and you have to flush several times before the contents of the bowl disappear.

What Causes Blockages?

There are many reasons why drains become blocked and not all of them are within your sphere of control. In answering the question of what causes blockages, I will also address the difference between soft and hard drain blockages.

Soft Drain Blockages

Soft blockages are the most common type of material clogging up drains. Hair mixed with soap scum is a very effective material for gluing up bathroom drains. In the case of toilets, excessive amounts of toilet paper, sanitary towels and even disposable nappies can do a great job of causing a pile-up in the U-bend. In the kitchen, blocked drains are usually caused by a build-up of cooking fat and food residue: deeply unpleasant and difficult to shift if it has been allowed to accumulate over a long period of time.

Clearing Soft Blockages

For minor blockages, your best bet is to try a drain cleaner from your local supermarket. They are usually effective when the blockage is relatively near the sink drain. However, if a lot of material has built up and the blockage extends deep down into the pipe system, you will require professional assistance in the form of a plumber and a plumbing snake. Toilet blockages can often be cleared with the aid of a large plunger. Alternatively, strap some rubber gloves on and go on an exploratory mission down the u-bend. It won’t be pretty, but it could save you time and money. If this doesn’t work, call a plumber.

Hard Drain Blockages

A hard blockage is more serious and expensive to fix. In this instance you are dealing with objects blocking the drain, usually outside. Tree roots are a good example of a hard drain blockage. Over time tree root systems can infiltrate external drains and sewer pipes causing all kinds of mayhem. Mineral build-ups are another example of a hard blockage, although this is more common in hard water areas and doesn’t happen overnight.

Clearing Hard Blockages

A bottle of drain cleaner is not going to get rid of a tree root in your drainpipe. In fact not even a plumber with his trusty sink plunger and plumbing snake is going to have much luck clearing a hard blockage. You may also need to hire a specialist drain camera inspection company to work out exactly where the blockage is.

For blocked drains, leaky towel radiators and any other plumbing emergencies, use your common sense: if you don’t have the skills or tools to fix the job, call in a plumber!

Add Style to Your Kitchen with a Designer Radiator

Kitchen makeovers are rarely cheap unless you have been lucky enough to be selected by a TV makeover programme to have the work done for free. And if you have, don’t start congratulating yourself yet because you could end up with a monstrosity only a flamboyant designer could love.

Because cost is such an issue, or at least it is for the majority of people, it is often tempting to try and cut corners on the budget. So instead of ripping out everything and starting with four walls and a window, you decide to keep the existing radiator and flooring in the hope that nobody will notice. But this is a huge mistake if you want the end result to be super stylish. It won’t be as expensive as you think to replace your old, slightly rusty radiator with a smart new designer towel radiator and the end result will be well worth it.

Does My Kitchen Need a Radiator?

Unless your home is still at the design stage, it is highly likely that you have at least one radiator in your kitchen. Radiators are a standard feature in the majority of UK homes and are designed to heat the space in rooms, kitchen included. However, since there are other sources of heat in a kitchen, most notably the oven, it may be that your kitchen is toasty warm without needing an extra source of heat.

If you are not sure whether a radiator is necessary, consider what else throws out heat in your kitchen. Do you have an Aga for example? If so, you can probably do without a radiator unless the Aga is for show only. You may also be able to manage without a kitchen radiator if you have a wood burning stove or similar in the kitchen. 

A Multi Functional Appliance

Before you opt to do without a radiator, remember that a radiator is more than just a source of ambient heat. Most people use radiators for other things. For example, radiators can be used to dry clothing, tea-towels, etc. They are very useful for hanging damp tea-towels and hand towels. They are also great for drying small items of laundry on damp days. So if you currently use your kitchen radiator for all that and more, or if the dog likes to have snooze beneath it on cold days, think twice before removing it and tossing it in the skip during your kitchen renovation.

Install a Designer Kitchen Radiator

Once you have established that you can’t possibly live without a kitchen radiator, the next stage is to consider whether (or not) you can live with the existing one. This will probably be an easy decision to make if you are spending lots of money on a designer kitchen and the existing radiator is old, chipped and rusty. But even if you are trying to save money on the project, a new radiator won’t break the bank and it will more than pay for itself when the kitchen installation is complete and you survey your smart new room.

Designer kitchen radiators come in many different styles and are available to suit all budgets. A beautifully sleek, vertical radiator will really add something special to a smart, modern kitchen design and a polished chrome radiator is the perfect accompaniment to a designer kitchen. You can use a towel radiator to hang towels, damp dish clothes and miscellaneous items when the weather is cold and wet outdoors.
Vertical Radiator

And finally, don’t forget that your old radiator has scrap value. Don’t throw it in the skip – instead take it to your local scrap merchant and pocket a bit of cash. You can put this towards the cost of a new designer radiator!

https://www.towelradiator.co.uk/blog/month/2014-8