Plumbing & Central Heating Related Posts
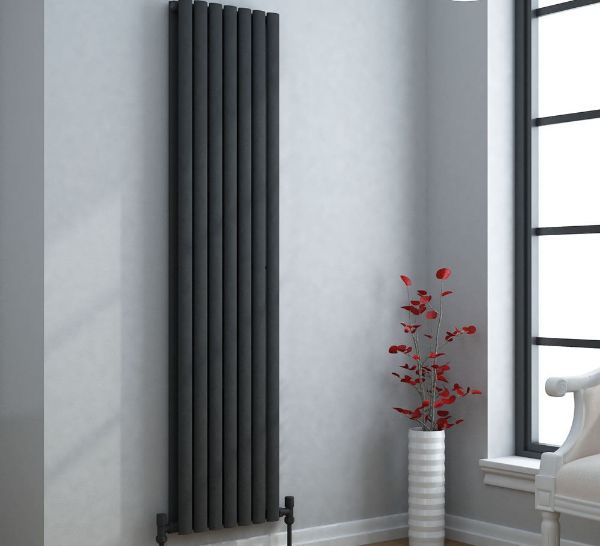
Are you looking for the best vertical radiators to heat up your kitchen? Vertical radiators are an excellent choice for kitchens because they can be installed in any corner of the room, providing an efficient and stylish heating solution. In this blog, we will discuss about some kitchen radiator ideas, the types of vertical radiators, their benefits, factors to consider when choosing the best kitchen radiators in UK, and tips for installing and maintaining them.
What are Vertical Radiators?
Vertical radiators are a type of heating system that is tall and thin, with a series of vertical columns that radiate heat. They are designed to be space-saving and can be installed into a corner or wall of the room. They come in various of styles to suit any décor, and they are an excellent way to add a contemporary look to your kitchen.
Types of Vertical Radiators
There are a variety of vertical radiators available on the market today. They come in different sizes, shapes, materials, and colours. Here are some of the most popular types of vertical radiators:
Steel Vertical Radiators: Steel radiators are the most popular type of vertical radiator. They are durable and efficient and come in a variety of designs and sizes.
Aluminium Vertical Radiators: Vertical aluminium radiators are a great choice for kitchens because they are lightweight, energy-efficient, and stylish. They come in various of colours, and some models even come with a timer for convenience.
Glass Vertical Radiators: Glass radiators are a great choice for kitchens because they are stylish and modern. They come in a variety of designs, and they are energy-efficient and heat up quickly.
Benefits of Vertical Radiators
Vertical radiators offer a variety of benefits for your kitchen. They are energy-efficient, space-saving, and can be installed in any corner of the room. They also come in a variety of designs, so you can find one that fits your kitchen’s décor. Here are some of the benefits of vertical radiators:
Energy-Efficient: Vertical radiators are energy-efficient because they heat up quickly and evenly. They also use less energy than other types of heating systems, which can save you money on your energy bills.
Space-Saving: Vertical radiators are a great choice for small kitchens because they take up less space than other types of radiators. They can be installed in any corner of the room, which frees up valuable floor space.
Stylish: Vertical radiators come in a variety of styles, so you can find one that fits your kitchen’s décor. They are also a great way to add a modern look to your kitchen.
Tips for Choosing the Best Vertical Radiators
When choosing the best vertical radiators for your kitchen, there are a few factors to consider. Here are some tips for choosing the best vertical radiators:
Size: Choose a vertical radiator that is the right size for your kitchen. Measure the area where you will be installing the radiator, and make sure to choose one that is the right size for the space.
Material: Choose a radiator that is made from a durable material. Steel and aluminium radiators are the most popular choices, but you can also find glass, wood, and other materials.
Design: Choose a vertical radiator that has a design that you like. There are a variety of designs available, so you can find one that fits your kitchen’s décor.
The Best Materials for Vertical Radiators
When choosing the best vertical radiators for your kitchen, it is important to consider the material they are made from. Here are some of the best materials for vertical radiators:
Steel: Steel is the most popular material for vertical radiators. It is durable and efficient and comes in a variety of designs.
Aluminium: Aluminium is an excellent choice for kitchens because it is lightweight, energy-efficient, and stylish. It also comes in various colours, so you can find one that fits your kitchen’s décor.
Glass: Glass radiators are an excellent choice for kitchens because they are stylish and modern. They come in a variety of designs, and they are energy-efficient and heat up quickly.
Factors to Consider when Buying the Best Vertical Radiators
When choosing the best vertical radiators for your kitchen, it is essential to consider a few factors. Here are some factors to consider when choosing the best vertical radiators:
Heat Output: Make sure to choose a vertical radiator with enough heat output to heat your kitchen effectively.
Installation: Make sure to choose a vertical radiator that is easy to install. Some models come with installation instructions, while others require professional installation.
Maintenance: Make sure to choose a vertical radiator that is easy to maintain. Some models require regular cleaning and maintenance, while others are more self-sustaining.
Style: Choose a vertical radiator that has a style that you like. There are a variety of styles available, so you can find one that fits your kitchen’s décor.
Buy the Best Vertical Radiators for Kitchens at a Reasonable Price
If you are looking for the best vertical radiators for your kitchen at a reasonable price, you should consider towelradiator.co.uk. We offer a variety of vertical radiators in different sizes, shapes, materials, and colours. We also offer competitive prices on our products, so you can find the best vertical radiators for your kitchen at a reasonable price.
Tips for Installing Vertical Radiators
Installing vertical radiators can be a bit tricky, so it is important to follow the instructions carefully. Here are some tips for installing vertical radiators:
Read the Instructions: Make sure to read the instructions carefully before you start installing the radiator. This will ensure that you install the radiator correctly and safely.
Check the Connections: Make sure to check the connections before you start installing the radiator. This will ensure that the connections are secure and that the radiator is properly connected to the power source.
Level the Radiator: Make sure to level the radiator before you install it. This will ensure that the radiator is evenly heated and that it heats up quickly and efficiently.
Maintenance and Care for Vertical Radiators
Vertical radiators require regular maintenance and care to ensure that they are working properly and efficiently. Here are some tips for maintaining and caring for vertical radiators:
Check the Connections: Make sure to check the connections regularly to ensure that they are secure and that the radiator is properly connected to the power source.
Clean the Radiator: Make sure to clean the radiator regularly to remove dust and dirt. This will ensure that the radiator is working properly and efficiently.
Inspect the Radiator: Make sure to inspect the radiator regularly to check for any signs of damage or wear. This will ensure that the radiator is in good condition and that it is working properly.
Conclusion
Vertical radiators are an excellent choice for kitchens because they are energy-efficient, space-saving, and stylish. When choosing the best vertical radiators for your kitchen, make sure to consider the size, material, design, and heat output. You should also make sure to choose a radiator that is easy to install and maintain.
If you are looking for the best vertical radiators for your kitchen at a reasonable price, you should consider towelradiator.co.uk. So if you’re looking for the best vertical radiators for your kitchen, make sure to follow these tips above.
With the right radiator, you can enjoy a stylish and efficient heating solution for your kitchen at a reasonable price. Buy the best vertical radiators from towelradiator.co.uk and enjoy a warm and cozy kitchen all year round.
With winter upon us, the nights are growing colder and you can no longer avoid turning the central heating on. If your central heating is in good condition, this will be a seamless process, but if your boiler is feeling its age, there is every chance that you might run into problems in the very near future. So how can you reduce your risk of ending up with no heating as winter approaches?
In a wet system, central heating boilers heat the water that circulates around your network of radiators. If the boiler is working correctly, you turn the heating on and within a few minutes the radiators will begin to heat up. There are other types of heating, but in the UK, a central heating boiler powered by gas, electricity or oil is the norm.
Annual Boiler Service
Boilers need servicing every year. Some boilers are less complicated than others – oil boilers have relatively few working parts – but even so, they still need checking over once per year if they are to remain in good working condition. If you buy a new central heating boiler, it will be covered by a warranty for parts and/or labour. This will give you peace of mind for the first twelve months or so, but you do still need to have it serviced.
Servicing a boiler helps to ensure that any faults are picked up before they become major problems. It also means your boiler will work more efficiently, which will save you money on fuel in the long term. However, there is little point in having your central heating boiler serviced if you don’t use a suitably qualified engineer. Engineers lacking experience or qualifications are not going to do a good job and under certain circumstances could even put your life in danger.
Gas Safety
Gas boilers need to be serviced by a Gas Safe registered gas engineer. Registered engineers are listed on the Gas Safe register; they also carry a Gas Safe registration ID card, which you can check. These are the only people who are legally allowed to work on gas appliances, including gas central heating coilers, so if you are not sure of an engineer’s qualifications, ask him to show you his Gas Safe ID card.
Simple Reasons Why the Heating Isn’t Working
If your central heating is not working, it is worth checking to see if there are any ‘quick fixes’ before you call out an engineer after hours.
If radiators are coming on, but not getting very hot, there may be air in the system so try ‘bleeding’ your radiators. If the radiators upstairs are hot, but the ones downstairs are stone cold, your pump might have stopped working. Another common problem is where the waste water pipe from the boiler to the outside freezes in very cold temperatures – using better insulation on the pipe can prevent this problem from recurring. Other possible issues include:
Gas boilers
- Has the pilot light gone our? If it has, try re-lighting it.
- Have you run out of gas – this is only applicable if you are on LPG rather than mains gas.
Oil boilers
- If the water pressure has dropped below safe level, the boiler will automatically lock out. To correct this, top up the water pressure and then press the restart button (check the manual for details on where to find this button).
- Have you run out of oil? This is unlikely if your oil tank has a sensor, but it can still happen if the sensor is faulty.
Central Heating in Rental Homes
Landlords are responsible for fixing central heating problems as quickly as possible. Having no spare cash to pay an engineer won’t cut it, so if your landlord drags their feet and you have been without heating and/or hot water for more than 72 hours, give your local housing officer a call and explain the situation.
Most central heating problems can be fixed fairly easily, but if your heating is off more than it is on, it might be time to replace the system with a new one.
Leaking taps are hardly an emergency, but if left to drip incessantly they can drive a person insane. A constantly dripping tap is also a tremendous waste of water, which if you are on a water meter, could prove to be rather expensive: a leaky tap can quite easily drip away up to 24,000 litres of water over a twelve month period. So why do people ignore leaky taps? A DIY FixMost people put up with a leaking tap because they mistakenly think it is difficult to fix and if they have to call out a plumber, it will cost them a fortune. But really, sorting out a leaky tap is well within the capabilities of a competent DIY enthusiast and if you have the right tools to hand, there is no reason why you can’t fix the tap yourself. | 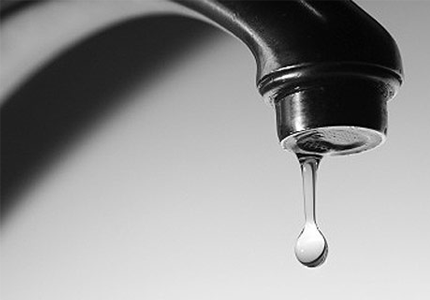 |
The Right Tools for the Job
To fix a leaking tap you need a few basic tools:
- A set of spanners
- A screwdriver
- Some clothes to protect the chrome tap fittings
- Replacement tap washer
Fixing a Leaking Tap
Before doing anything, make sure you turn the water off at the mains stop tap. Do make sure the water is off before you remove the problem tap or you will end up soaked and standing in a foot of water, which won’t do either the kitchen or bathroom much good. To do this, turn the taps on and leave them to drain out until there is no more water in the pipes.
Remove the top of the tap and the screw beneath. This will enable you to take the tap head off. If the tap head is stuck, spray some WD-40 into it to loosen it up (you may need to leave it for ten minutes or so to work).
Remove the body of the tap using a spanner. Do this very carefully and protect the chrome surface with a soft cloth. The washer is the circular rubber donut at the end of the tap body. Replace it with a new washer and re-assemble the tap, making sure you don’t over tighten any of the parts.
Turn the water back on and test the tap (if no water comes out, make sure you have closed off all the other taps). Does it still leak? If so, the washer was not the underlying issue and you need to go back to the drawing board and start again.
When the Washer isn’t the Problem
More often than not, a worn out washer is not the cause of a leaking tap. A more likely root cause is the valve seat upon which the washer sits. Over time, this becomes worn, often as a result of lime scale in hard water. The surface develops fine grooves and etched lines, which break the seal of the washer and allow water to seep through. Grinding down this surface with a purpose made seat grinder will solve the problem by creating a smooth surface for the tap washer to adhere to.
Help! I Can’t Fix My Tap!
In theory it should take no more than 20 minutes to fix a leaking tap, but if the mechanism is worn or you have tried all of the above and you still have a leak, then it is probably time to call on a plumber to do the job for you. Most plumbers will charge for one hour’s work, even if the job takes them less than five minutes, including a cup of tea and a chat. If you want to pay as little as possible, try and be flexible about when the plumber can visit – if he is able to call in on his way home, for example, he might charge you less. Or wait for a few weeks and call him to install your new stainless steel towel radiator and replace your tap at the same time.
Don’t forget to get a couple of quotes before engaging a plumber and ideally go with someone you know or who comes with good references.
Blocked drains of any description can be a total nightmare. Nobody likes standing in a foot of soapy water every time they have a shower and a blocked toilet is deeply unpleasant, particularly if it’s the only one available and you all ate curry last night. Blockages are one of the commonest plumbing problems. They affect most home and business owners at one time or another, but what not many people realise is that there are two types of blockage: hard and soft. So what is the difference and how should you deal with each type of blockage?
Do I Have a Blocked Drain?
Drain problems often develop slowly. In the beginning when all is right with the world and your drains, water disappears instantly down the plughole and you don’t give the matter a second thought. After a while, though, you have standing water in the sink, shower or bath and curious ‘glugging’ noises are emanating from the plughole as the water slowly drains away. In the case of toilets, you might find that it doesn’t always flush properly and you have to flush several times before the contents of the bowl disappear.
What Causes Blockages?
There are many reasons why drains become blocked and not all of them are within your sphere of control. In answering the question of what causes blockages, I will also address the difference between soft and hard drain blockages.
Soft Drain Blockages
Soft blockages are the most common type of material clogging up drains. Hair mixed with soap scum is a very effective material for gluing up bathroom drains. In the case of toilets, excessive amounts of toilet paper, sanitary towels and even disposable nappies can do a great job of causing a pile-up in the U-bend. In the kitchen, blocked drains are usually caused by a build-up of cooking fat and food residue: deeply unpleasant and difficult to shift if it has been allowed to accumulate over a long period of time.
Clearing Soft Blockages
For minor blockages, your best bet is to try a drain cleaner from your local supermarket. They are usually effective when the blockage is relatively near the sink drain. However, if a lot of material has built up and the blockage extends deep down into the pipe system, you will require professional assistance in the form of a plumber and a plumbing snake. Toilet blockages can often be cleared with the aid of a large plunger. Alternatively, strap some rubber gloves on and go on an exploratory mission down the u-bend. It won’t be pretty, but it could save you time and money. If this doesn’t work, call a plumber.
Hard Drain Blockages
A hard blockage is more serious and expensive to fix. In this instance you are dealing with objects blocking the drain, usually outside. Tree roots are a good example of a hard drain blockage. Over time tree root systems can infiltrate external drains and sewer pipes causing all kinds of mayhem. Mineral build-ups are another example of a hard blockage, although this is more common in hard water areas and doesn’t happen overnight.
Clearing Hard Blockages
A bottle of drain cleaner is not going to get rid of a tree root in your drainpipe. In fact not even a plumber with his trusty sink plunger and plumbing snake is going to have much luck clearing a hard blockage. You may also need to hire a specialist drain camera inspection company to work out exactly where the blockage is.
For blocked drains, leaky towel radiators and any other plumbing emergencies, use your common sense: if you don’t have the skills or tools to fix the job, call in a plumber!
The bathroom is considered one of the most private rooms of the home, and certainly the most important to proper hygiene. We all have heard about the value you can add to your home by remodelling your bathroom, but what many people fail to realise is the potential cost a bathroom can add to your credit card if small issues are not caught and fixed promptly. Between plumbing systems and heating systems that run throughout the area, small problems can quickly turn into costly ordeals that impact the quality and value of your house. While there are quite a few different issues that could potentially arise in any bathroom, we will be covering three major issues that are the most common problems in any bathroom. If you act quickly when the symptoms are spotted, then you'll be able to get one step ahead of the problem and avoid massive remodelling or repair bills.
Check Your Water Pressure
While a bathroom radiator or a heated towel rail can help provide air comfort in the cold winter months, your water is usually heated by a water heater or boiler. This device contains all sorts of equipment that individually are quite simple, but all work together to ensure proper functioning of your plumbing and hot water. The pressure regulator is one of these parts, and it's designed to keep the water flowing properly while not causing damage to your plumbing. If your pressure indicator states that the water pressure in your pipes is above 550 kPa, then you are in danger of causing a pipe rupture. These costly occurrences become astronomically expensive if not easily accessible, so be sure to regularly test your pipe pressure.
Install a Powerful Bathroom Radiator
The winter months can be difficult on your body and spirit, but pipes don't complain until it is too late. The cold climate of winter will in some cases cause weakened pipes to rupture. If your bathroom is adjacent to the exterior of the home, then a risk of ruptured pipes in your bathroom increases. One way you can help prevent this is by installing one of our bathroom radiators. Not only will this keep the ambient temperature in the room high enough on the coldest of nights to prevent a rupture, but it is also useful for avoiding those freezing winter mornings when you have to jump into the shower. A couple of hundred pounds of investment today makes a lot more sense than a couple of thousand pounds of plumbing bills tomorrow.
Install Above-Floor Plumbing
Did you know that many toilets now exist with above-floor plumbing to help minimise repair problems in the bathroom? These macerating, above-floor units take water in from the sink or shower, and use a very powerful pump to liquefy any contents that are expelled before they are sent back the same way, into the sewer or septic tank. A leaky toilet can cause untold number of problems, including smelly bathrooms and rotten floors. An above-floor plumbing system for your toilet (these can also be used on sinks and showers) will prevent these issues from occurring, since the toilet's bond with the floor becomes structural and not plumbing-related. No more replacing toilet seals or worrying about maintenance costs whenever a leak springs up!
Nobody wants to deal with costly plumbing problems. Sometimes, the solution to this is to have a proactive approach. Whether you are keeping an eye on your existing plumbing systems or replacing them with a less-liable alternative, you can certainly minimise the likelihood of any problems tomorrow by acting today. With this information in hand, you can now decide whether or not you are doing everything you can to keep your bathroom – and plumbing – in great shape!
- 1
- 2
- 2025
- 2024
- 2023
- 2022
- 2019
- 2018
- 2016
- 2015
- 2014
- 2013
- 2012

